
Drobo first impressions
Category Drobo Storage
Yesterday my Drobo, DroboShare and two 1tb SATA drivers arrived. I think I'm like a woman with shoes when it comes to external hard drives, honestly you can never have too many of these things, well you can and I think I'm approaching the too many mark so I was looking for some system to perform more backups across my network, and something that has some data failure features built in. A few friends had recommended Drobo so I decided to look into it. Basically with the standard Drobo, you get a SATA drive enclosure that hooks up to your PC/Mac with a USB 2.0 or Firewire 800 cable, and the enclosure automatically offers RAID 5 type capabilities. What is really nice about the Drobo however, is that your drives don't have to be identical sizes, they don't have to be identical speeds, they just have to be SATA drives and Drobo will do the rest of the configuration etc. like magic. This is good, as I have numerous SATA drives of different sizes lying around, from various PC upgrades. But what really makes Drobo very cool is it's hot swap capabilities, change/upgrade drives etc without turning the device off and without having to stop other applications accessing it, that's a pretty nice feature to have.
What follows is my initial impression of Drobo, the out of box experience and other comments, still early days so don't expect too many comments.
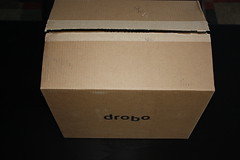
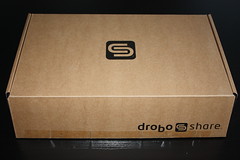
Pretty standard brown box
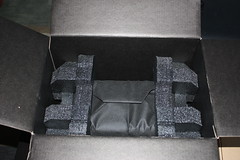
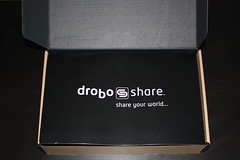
Upon opening the box you see

After removing the top layer box you see a cloth package inside shipping foam
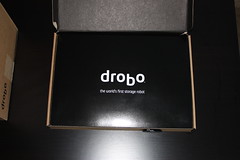
Upon opening the smaller box
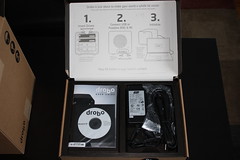
Lifting the flap reveals, some instructions and the contents, setup CD, auto sensing power adapter (100-240v), USB 2.0 Cable, Firewire 800 cable
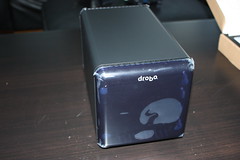
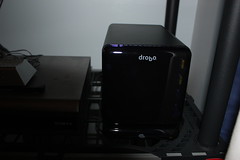
Unwrapping the cloth package, reveals the Drobo
Front:
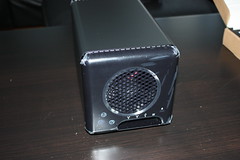
Back, USB port, two Firewire 800 ports, power socket, security key lock socket:
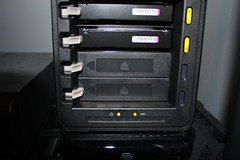
The front panel is held on with some magnets and is easily removed by just pulling gently on it, removing the front panels reveals the area where the hard drives are pushed in, and a drobo read me reminder.

The drobo has various lights that indicate the status of drives and available capacity, For reference there is a descriptor of their various states nicely laid out on the back of the front panel.
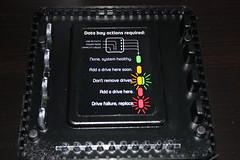
One set of lights that isn't shown yet, as I don't have much data on there is the blue lights across the bottom, these represent 10% of disk space in use, so as you use another 10% another blue light goes on.
Plugging in the components is pretty easy, plug one end USB cable into back of Drobo, other end into PC. Plug in power for Drobo and then insert the Drobo CD into the PC.
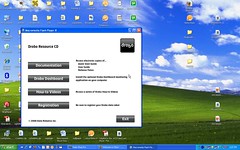
Select the option to install Drobo Dashboard. I was a little dissapointed to see the How to videos take you to a Drobo website, the videos aren't on the CD, which means you need to be connected to the internet to watch them. The Installer is your standard MSI, nothing fancy.
Once installed you'll see a message "Ready For Connection"
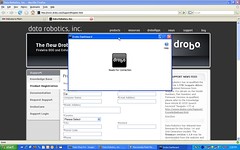
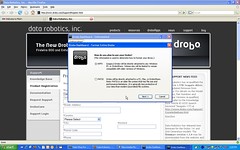
and you'll be prompted to see if there are updates
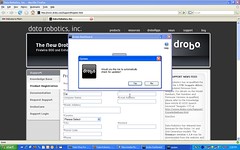
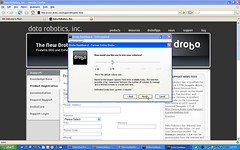
Then as this is the first time it's been setup, the Drobo will let you know that your drives need formatting:
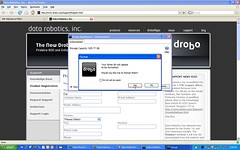
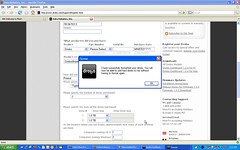
Drobo Dashboard will prompt for the format type you want to use
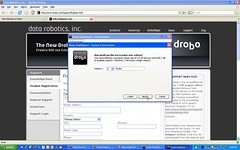
Drobo then prompts for the volume size, to be honest, it isn't really clear what this size is for exatly, and I'm not sure even now. Is it the maximum volume size if I add more drives?
Next we can assign a drive letter to Drobo, Z: was my choice, it had suggested my next available drive letter F:
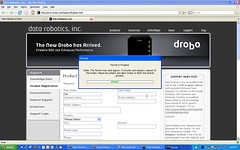
And then Drobo asks us to confirm the Format

It then formats and restarts the Drobo
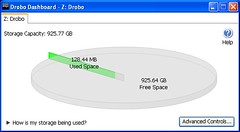
The Drobo Dashboard then shows the status of the drive, no idea what the 128.44 Mb of disk already in use is, it was just formatted.
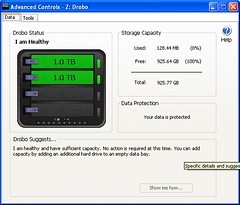
Clicking the Advanced Controls buttons shows me, the current drives in there, their size and their state.
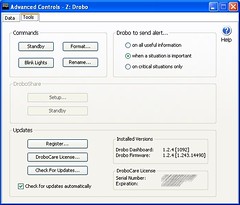
Clicking the Tools Tabs, provides access to some additional options
So that's it Drobo as a USB attached drive is now setup and configured, not much else to it really apart from use the drive. Except I also purchased DroboShare, so I needed to configure that.
DroboShare is a device that attachs to the Drobo, and allows the Drobo to be used as Network Attached Storage(NAS), DroboShare also allows for 3rd party developers to create applications that run on the device, there are some out there like iTunes server, FTP client/Server, bit Torrent client etc. DroboShare also comes in a brown box
Similar to the main drobo, you open the box and there is a flap with a welcome message
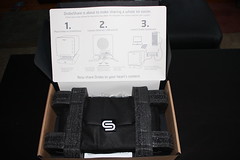
and under the flap you'll find instructions and the DroboShare in a small canvas bag
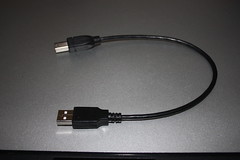
Removing the DroboShare from the box revealse the power adapter cable, USB cable and network cable.

Cleverly, rather than shipping a separate power supply with the DroboShare, they ship a Y splitter instead, and share the power adapter that comes with the main Drobo.
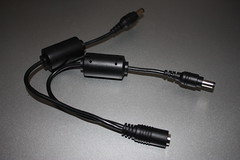
The USB cable is also short, so you don't have lots of excess cable lying around behind the device
The DroboShare has two USB connectors, a Gigabit network adapter and power socket. The DroboShare supports the connection of two Drobo devices (which in theory means 32Tb of backup).
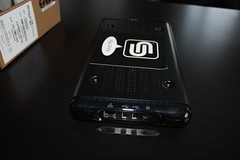
The DroboShare just sits underneath the Drobo
Upon connecting the Drobo and the DroboShare together using the provided USB cable, and connecting the DroboShare to the network, the Drobo Dashboard, recognizes that there is a DroboShare on the network and now enables the Setup button on the Drobo Dashboard Tools tab, which takes you to the Network settings. Where you can choose to assign a static IP address and a name and password to access the device over a network.

DroboApps is an area I haven't yet had time to play much with yet, the installation is a little weird, in that you download a DroboApp from the Drobo website, then place it into the DroboApps folder on the drobo and then restart the device, restarting the Drobo is a little strange, it doesn't have a power swtich and there isn't a restart option on the Drobo Dashboard, the best I could come up with was to put the device in standby, then pull the cord (apparently there is a DroboApp that has a restart option so I will look into that). Documentation on DroboApps appears to be pretty poor, for example the Fuppes app which enables the Drobo to be used as a UPnP media player is really really poor. I think this is an exciting area for the device and I look forward to seeing more apps coming available.
So that's it for now, my movie backups are currently being moved across to the device. If you're wondering what I use for backing up my PCs I use Acronis, it has saved me numerous times, and with the addition of Drobo I will be moving to a nightly delta backup for many of my machines.
Yesterday my Drobo, DroboShare and two 1tb SATA drivers arrived. I think I'm like a woman with shoes when it comes to external hard drives, honestly you can never have too many of these things, well you can and I think I'm approaching the too many mark so I was looking for some system to perform more backups across my network, and something that has some data failure features built in. A few friends had recommended Drobo so I decided to look into it. Basically with the standard Drobo, you get a SATA drive enclosure that hooks up to your PC/Mac with a USB 2.0 or Firewire 800 cable, and the enclosure automatically offers RAID 5 type capabilities. What is really nice about the Drobo however, is that your drives don't have to be identical sizes, they don't have to be identical speeds, they just have to be SATA drives and Drobo will do the rest of the configuration etc. like magic. This is good, as I have numerous SATA drives of different sizes lying around, from various PC upgrades. But what really makes Drobo very cool is it's hot swap capabilities, change/upgrade drives etc without turning the device off and without having to stop other applications accessing it, that's a pretty nice feature to have.
What follows is my initial impression of Drobo, the out of box experience and other comments, still early days so don't expect too many comments.
Pretty standard brown box
Upon opening the box you see
After removing the top layer box you see a cloth package inside shipping foam
Upon opening the smaller box
Lifting the flap reveals, some instructions and the contents, setup CD, auto sensing power adapter (100-240v), USB 2.0 Cable, Firewire 800 cable
Unwrapping the cloth package, reveals the Drobo
Front:
Back, USB port, two Firewire 800 ports, power socket, security key lock socket:
The front panel is held on with some magnets and is easily removed by just pulling gently on it, removing the front panels reveals the area where the hard drives are pushed in, and a drobo read me reminder.
The drobo has various lights that indicate the status of drives and available capacity, For reference there is a descriptor of their various states nicely laid out on the back of the front panel.
One set of lights that isn't shown yet, as I don't have much data on there is the blue lights across the bottom, these represent 10% of disk space in use, so as you use another 10% another blue light goes on.
Plugging in the components is pretty easy, plug one end USB cable into back of Drobo, other end into PC. Plug in power for Drobo and then insert the Drobo CD into the PC.
Select the option to install Drobo Dashboard. I was a little dissapointed to see the How to videos take you to a Drobo website, the videos aren't on the CD, which means you need to be connected to the internet to watch them. The Installer is your standard MSI, nothing fancy.
Once installed you'll see a message "Ready For Connection"
and you'll be prompted to see if there are updates
Then as this is the first time it's been setup, the Drobo will let you know that your drives need formatting:
Drobo Dashboard will prompt for the format type you want to use
Drobo then prompts for the volume size, to be honest, it isn't really clear what this size is for exatly, and I'm not sure even now. Is it the maximum volume size if I add more drives?
Next we can assign a drive letter to Drobo, Z: was my choice, it had suggested my next available drive letter F:
And then Drobo asks us to confirm the Format
It then formats and restarts the Drobo
The Drobo Dashboard then shows the status of the drive, no idea what the 128.44 Mb of disk already in use is, it was just formatted.
Clicking the Advanced Controls buttons shows me, the current drives in there, their size and their state.
Clicking the Tools Tabs, provides access to some additional options
So that's it Drobo as a USB attached drive is now setup and configured, not much else to it really apart from use the drive. Except I also purchased DroboShare, so I needed to configure that.
DroboShare is a device that attachs to the Drobo, and allows the Drobo to be used as Network Attached Storage(NAS), DroboShare also allows for 3rd party developers to create applications that run on the device, there are some out there like iTunes server, FTP client/Server, bit Torrent client etc. DroboShare also comes in a brown box
Similar to the main drobo, you open the box and there is a flap with a welcome message
and under the flap you'll find instructions and the DroboShare in a small canvas bag
Removing the DroboShare from the box revealse the power adapter cable, USB cable and network cable.
Cleverly, rather than shipping a separate power supply with the DroboShare, they ship a Y splitter instead, and share the power adapter that comes with the main Drobo.
The USB cable is also short, so you don't have lots of excess cable lying around behind the device
The DroboShare has two USB connectors, a Gigabit network adapter and power socket. The DroboShare supports the connection of two Drobo devices (which in theory means 32Tb of backup).
The DroboShare just sits underneath the Drobo
Upon connecting the Drobo and the DroboShare together using the provided USB cable, and connecting the DroboShare to the network, the Drobo Dashboard, recognizes that there is a DroboShare on the network and now enables the Setup button on the Drobo Dashboard Tools tab, which takes you to the Network settings. Where you can choose to assign a static IP address and a name and password to access the device over a network.
DroboApps is an area I haven't yet had time to play much with yet, the installation is a little weird, in that you download a DroboApp from the Drobo website, then place it into the DroboApps folder on the drobo and then restart the device, restarting the Drobo is a little strange, it doesn't have a power swtich and there isn't a restart option on the Drobo Dashboard, the best I could come up with was to put the device in standby, then pull the cord (apparently there is a DroboApp that has a restart option so I will look into that). Documentation on DroboApps appears to be pretty poor, for example the Fuppes app which enables the Drobo to be used as a UPnP media player is really really poor. I think this is an exciting area for the device and I look forward to seeing more apps coming available.
So that's it for now, my movie backups are currently being moved across to the device. If you're wondering what I use for backing up my PCs I use Acronis, it has saved me numerous times, and with the addition of Drobo I will be moving to a nightly delta backup for many of my machines.
| Permalink | ![]()
![]()
![]()
Comments
Posted by Glen At 06:27:53 PM On 12/23/2008 | - Website - |
I bought 2 Drobos with 4x1Tb drives each and a Droboshare for D2D backups. Ease of set-up and use are bonuses but overall I'm disappointed with the performance especially with the Droboshare. The Droboshare is the bottleneck.
I'm also disappointed that you have to own a Drobo before you can register for the forums. If I knew what I know now I would have never bought a drobo
Posted by Gary Cousins At 02:22:12 AM On 12/24/2008 | - Website - |
There is another option to connect the devices via USB or Firewire directly to a server, but that won't be too much faster.
The goal is to get ALL this data transferred to the Drobo devices in a day and then shipped via FedEx overnight to a data center in Dallas to get it hooked up to another gig ethernet network to complete the data transfer.
Any thoughts or other ideas on getting 2.2TB to from Chicago to Dallas!?
Posted by Chringam At 01:07:49 AM On 02/04/2009 | - Website - |